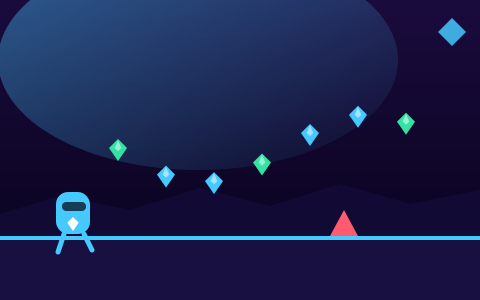
Every collection game asks you to do two things that pull against each other: go where the gems are, and avoid what is next to them. The gems are placed near danger on purpose, because that is where the decisions live.
Handling that well is mostly about reading hazards rather than reacting to them, and reading hazards is far more learnable than most players assume.
Learn six shapes once
Every game on this site uses the same six hazard silhouettes. Learn them once and every game here is readable on your first run.
| Shape | What it is | Behaviour |
|---|---|---|
| Triangle | Spikes | Static. Placed on surfaces. Never moves. |
| Spinning star | Cutter | Always spinning; often patrols a fixed range on one axis. |
| Capsule between two emitters | Beam | Blinks on a fixed period with a visible warning phase. |
| Circle with a moving eye | Drone | Drifts along a set route, usually vertical. |
| Rough tumbling polygon | Boulder | Falls or rolls with real momentum. |
| Toothed block | Crusher | Moves along one axis, solid as well as deadly. |
Consistency is the whole point. If each game used its own vocabulary, you would relearn it every time; because they share one, recognition transfers and your first run in a new game is not spent working out what things are.
Watch one cycle
The most transferable piece of advice in the genre: before committing to a route past a moving hazard, watch it complete one full cycle.
Patrolling hazards travel a fixed range on a fixed axis at a fixed speed. One cycle contains their entire future behaviour — where they go, how far, how fast, and when they return. There is nothing left to learn after that.
A cycle typically takes one to two seconds. In a stage-based game, where nothing moves until you do, watching one costs nothing at all. In a timed game it costs a second or two of clock. In both cases, a wrong guess costs a run.
The players who look calm around hazards are usually the ones who spent two seconds watching. The players who look busy are guessing.
Cross behind, never in front
The single most useful positional rule.
When a hazard is moving and you need to get past it, cross behind its direction of travel. Behind, its motion carries it away from you, so a small misjudgement in your timing is absorbed. In front, you are racing it, and the same misjudgement puts you directly in its path.
This applies to everything that moves: patrolling cutters, drifting drones, roaming creatures in mazes, the runaway cart in Treasure Tunnel, the guards in Castle Gem Hunt.
The best moment to cross is immediately after a hazard reverses direction at the end of its range. It is then at its furthest from where it is going, and you have the maximum possible margin.
Count beams, do not react to them
Timed hazards are the ones players most often describe as unfair, and almost always because they are being reacted to rather than counted.
A beam runs on a period with a duty cycle — for example, a 2.2-second period with a 45 per cent duty, meaning about a second dangerous and 1.2 seconds safe, repeating forever. There is a visible warning phase before it fires.
The important property is that the period never changes mid-cycle. That makes it countable, and counting has a huge advantage over reacting: it gives you a consistent early move rather than a variable late one. At 400 pixels per second reacting works. At 760 it does not, and counting still does.
Practically: when a beam enters the screen, watch one on-off cycle and start counting. Your move happens on the beat, not on the beam.
The gems help here too. In a well-built game the collectibles past a beam gate sit inside the safe window, so if you are collecting them cleanly you are reading the rhythm correctly.
When to abandon a cluster
Sometimes the correct play is to give up a cluster entirely. The decision is worth making explicitly rather than by instinct.
Look at the hardest gem first. If you would not attempt that one on its own, the cluster is a skip. The easy gems around it do not change the answer.
Skip the whole thing. Taking the safe half and leaving the rest breaks your chain exactly as thoroughly as leaving all of it. Half a cluster is the worst available outcome.
Weigh it against your multiplier. At a five-times multiplier, a cluster of six plain gems is worth 300 points, and losing your chain costs the twenty gems it will take to rebuild — usually several hundred more. At a broken chain, the same cluster is nearly free to attempt.
Count your shields. A held shield changes the maths entirely. With one in hand, a cluster you would refuse becomes attemptable, because the downside is a spent charge rather than a lost run.
Why near misses survive
One thing worth knowing, because it affects how aggressively you can play: deadly collisions are tested against a hitbox slightly smaller than the visual.
Every deadly hazard is checked against a box inset by a few pixels. If it looked like a near miss, it was one. Collection works the other way — the pickup radius is a few pixels larger than it looks — so if it looked like a collection, it was one.
Neither changes anything you can see, and together they mean the game behaves the way it looks. That is worth trusting: threading a gap that appears passable generally is passable, and you can play closer to hazards than instinct suggests without the game punishing you arbitrarily.
What it does not mean is that hazards are forgiving. It means the boundary is where you think it is.
Key takeaways
- Six hazard silhouettes recur across the whole site; learning them once makes every game readable on a first run.
- A patrolling hazard's full behaviour is contained in one cycle — watching it costs a second and saves runs.
- Cross behind a moving hazard: behind, its motion carries it away from you.
- Timed beams run on fixed periods, so counting beats reacting — especially at speed.
- Deadly collision uses an inset hitbox, which is why a genuine near miss survives.
Frequently asked questions
How do I know what a hazard will do before it reaches me?
By its shape. The six silhouettes each have one behaviour: spikes are static, cutters spin and often patrol, beams blink on a fixed cycle, drones drift on set routes, boulders tumble, crushers move along one axis.
Should I cross in front of or behind a moving hazard?
Behind, essentially always. Behind, its motion is carrying it away from you; in front, you are racing it, and a small misjudgement puts you in its path.
Why do beams feel unfair at high speed?
Because you are reacting rather than counting. The period is fixed and never changes mid-cycle, so counting the rhythm gives you a consistent early move where reacting gives you a variable late one.
Is it ever right to take a hit deliberately?
If you are carrying a shield and the alternative is missing a large cluster, sometimes yes. A shield absorbs the collision and preserves your streak, so spending one to complete a cluster can be correct.
Put it into practice
Reading about collection routes only gets you so far. Pick a game and try one idea from this guide on your next run.